Wow! I am so excited to show you all my projects I've created for the I Am Roses open DT call. If you have not worked with I Am Roses flowers or have not seen their website please check it out
HERE! I can't say enough how AMAZINGLY gorgeous these flowers are. I just ordered my first bunch a couple weeks ago. I primarily ordered mixed packages so I could see and play with more colors than if I were to just buy same color packages. I purchased 6 different bunches and a pack of skeleton leaves and can say they have a customer for life. Bunma, the owner of I Am Roses was great with communication and provided an excellent buying experience which is very much appreciated. The company is based in Thailand and the packages can take some time to get to the customer (because of customs), but I was so excited when I received my order days before I had expected it.
Anyhow... on to my projects! :) I decided to make two very different projects to show case my versatility as well as the flowers. I first made an Altered Photo Tray using Graphic 45's Hallowe'en in Wonderland paper collection and a photo tray from Hobby Lobby. This was the first time I have used this collection! I love the dark colors of this paper and it went beautifully with the IAR flowers. Here is the photo of the entire project and down below you can see piece by piece very detailed images:
I'm going to walk through this project in detail to explain what I did and the products I used. Top left corner:
I used the "Alice's Tea Party" pattered paper I cut the selected section and then edged it with Tim Holtz Walnut Stain Distress Ink. The flowers on this section are all from R6-827. That is a mixed brown and similar classic tone pack of 1" roses. I used a Tim Holtz Must Token that says Courageous on it and adhered that below two of the roses.

Moving over to the right hand corner! The patterend paper is titled "Mad Hatter" and Ijust loved the purple in this one. Again I edged the paper with the TH Walnut Stain Distress Ink. The flowers in the corner are as follows: the cream is from R6-827, the black is from R6-610, the cream and burgundy is from R21-310 and then the small natural skelteon leave is K1-805. The bottle is a 7Gypsies Glass Bottle and is filled with water and gold glitter. I tied a piece of peach and white bakers twine around the top after attaching a piece of vellum with the saying "drink me". If you haven't seen or read Alice in Wonderland you may not understand this reference. ;)

Middle left section was made using the "Through the Looking Glass" patterned paper. I thought I was going to have a hard time matching a flower to this paper because it was blue but seeing as orange compliments blue I went with a peach colored flower from the R40-1 mixed Yellow, Tangerine and Similar Tones and the cream with brown tips is from the R21-310 pack. I also used another skeleton leave as well as a button with bakers twine for embellishment. I took one of the Tim Holtz Word Keys that says "Secret" on it and tied some hand dyed seam binding and brown tulle.
I used the "Square Hare" patterned paper as the base of this section. All the flowers are from the R21-310 pack. Again I used a skeleton leave and another button from my stash. I took a Tim Holtz Adage Ticket saying "Dream" on it and edged it with Walnut Stain Distess Ink then painted it with the Tim Holtz Distress Crackle Paint in Rock Candy. I used a Tim Holtz Memo Pin to display the altered ticket.
Bottom left corner displays the "Curisouer & Curisouer" patterned paper and the cream flower with the tan tips is from the R21-310 pack and the other two are from R6-827 pack. I used a Tim Holtz Philosophy Tag that says "Wander" on it and hot glued it under the flowers.
The last and final section was made using the "Alice's Tea Party" patterned paper again. It is just the reverse side of the other one. I LOVE how this section turned out. The plum and black flowers are from the R6-610 pack and the cream is from the R6-827 and then again the skeleton leave. I then used the Tim Holtz Idea-ology Pocket Watch Frame. I used a die cut from the paper collection and two Tim Holtz Game Spinners to create the hands.
On the center of the photo tray is a cut out from the "Hallowe'en in Wonderland" patterned paper. Then the bottom of the frame I made a pleated ribbon using a velvet green trim and then a lavender and cream flower from the R21-809 pack and a spray I had in my stash.
What do you think?!?!? I really and happy with how it turned out. The flowers just make it look so finished and gorgeous!
Now onto my 2nd submission:
My second submission is an Altered Picture Frame. The frame is one of the $1.00 frames from Michaels.
I painted the from first using Americana paint in Grape Juice mixed with Black. I then applied a Crackle Medium on top of the base layer. I then mixed Americana Violet Pansy with Metallic Pearl and applied it over the crackle medium. The paper collection I used is the Que Sera Sera collection by K&Co. I loved the vibrant colors in this paper and thought they would go with the brighter flowers I purchased.

I cut out the bird and birdcage from the Tim Holtz Alterations Birdcage Die. I used a piece of Grungepaper to cut the birdcage and a piece of vintage music sheet for the bird. I glued the music sheet to some chipboard to me the bird a little bit more dimensional and sturdy. After the image was cut I took Tim Holtz Distress Embossing Ink and inked up the entire cage. I then applied the Distress Embossing Powder in Vintage Photo and used my heat tool to set the poweder. After it cools completely I rub my finger over the whole shape to knock loose some of the powder and expose the grunge paper underneath. I then go over the image with Vintage Photo Distress Ink and a little bit of Black Soot Distress Ink to give it a weathered look. As for the bird I inked it up with Tumbled Glass Distress Ink and then edged it with the Walnut Stain. I loved the blue bird and how the color worked so well with the paper and the IAR flowers!

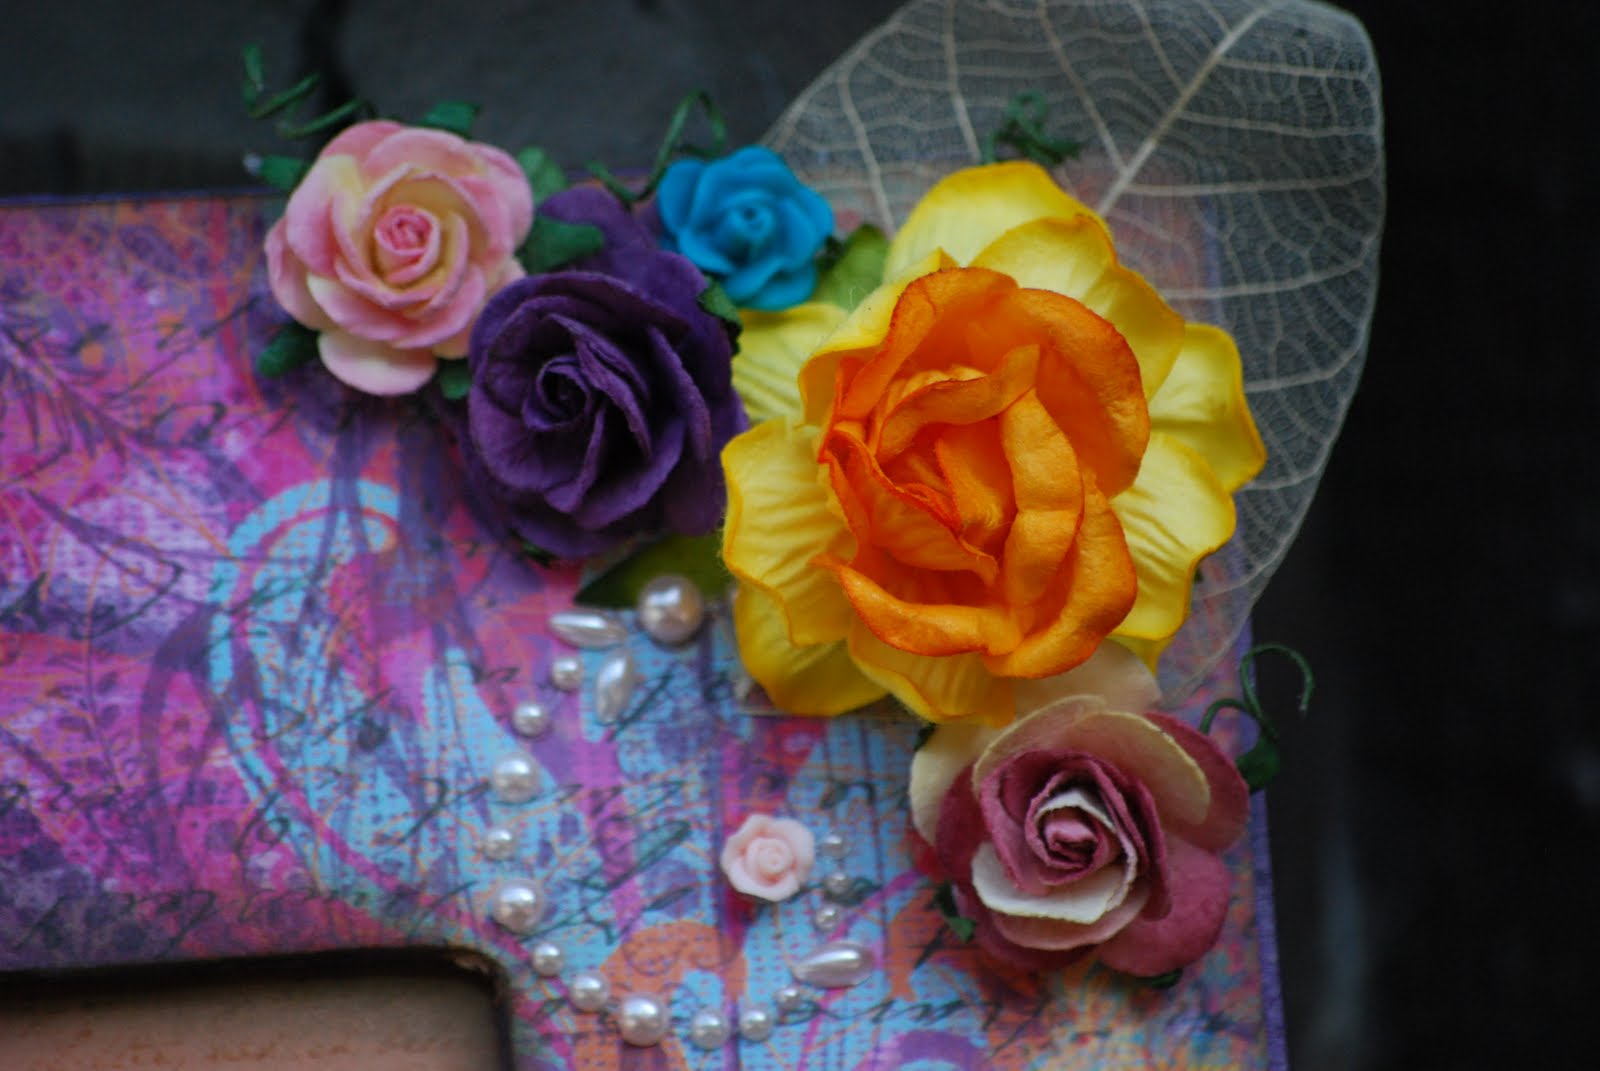
I just love these colors! I think the vibrancy of the colors is so beautiful. For this corner of the frame I used several I Am Roses flowers. Starting with the small pink and yellow one. I received this as a thank you gift for placing an order with Bunma so I am not 100% sure what pack these are from. But I have looked at the site so much that I think they are probably the R3-1 Mixed Pink Tone pack. They are so super gorgeous! These pictures don't do them justice! The deep purple flower is from R6-827 pack which was the Mixed Brown and Similar Classic Tones. The vibrant orange and yellow is from the R40-1 mixed Yellow, Tangerine and Similar Tones package! I also used one burgundy and cream rose from R21-310. Behind the roses is a small natural skeleton leave. I used some Prima light pink "Say it in Pearls" as well as one Recollections hard resin turquoise flower.

This corner of the frame displays another wide variety of the I Am Roses flowers. First we have the lavender and cream from the R21-809 pack, another larger rose from the R40-1 mixed Yellow, Tangerine and Similar Tones, the brown with darker tips is from the R6-827 pack which was the Mixed Brown and Similar Classic Tones and then again the small pink and yellow rose from the thank you pack. I again used some of the pink Prima "Say it in Pearls" and a handmade stick pin to match the frame.
In the center of the frame I stamped a sentiment and some images from the Tim Holtz Visual Artistry Collection titled "Flights of Fancy". The background stamp is a french script stamp from Glitz Design titled "Distressing". I stamped the background image using Wild Honey Distress Ink and the foreground sentiment and butterfly images using Tuxedo Black by Memento. The top most left hand corner of the frame has a TH corner for added embellishment.
I really hope you enjoyed reading about and seeing my finished projects using I Am Roses. I am so excited to place my next order. They are just so amazing and I am hooked on them! Please check them out if you have not already! :)
XoXo,
Katie
SUPPLIES